Keeping your supplier information accurate and up to date is key to smooth operations and compliance—especially with Malaysia’s e-Invoicing framework. In this guide, we’ll show you exactly how to add a new supplier in KinraSoft, covering everything from business registration to TIN validation, account settings, and credit terms.
Whether you’re adding a business, individual, or government entity, this guide will help you manage your supplier records with confidence.
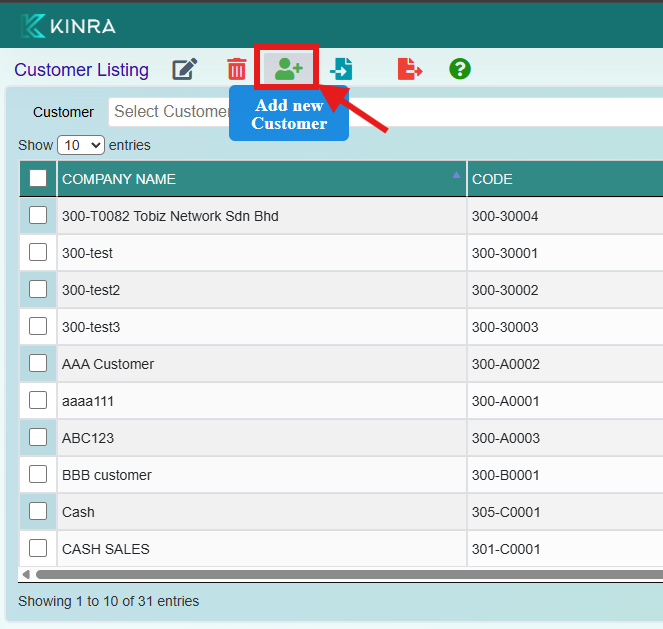
✅ Step 1: Access the Supplier Maintenance Page
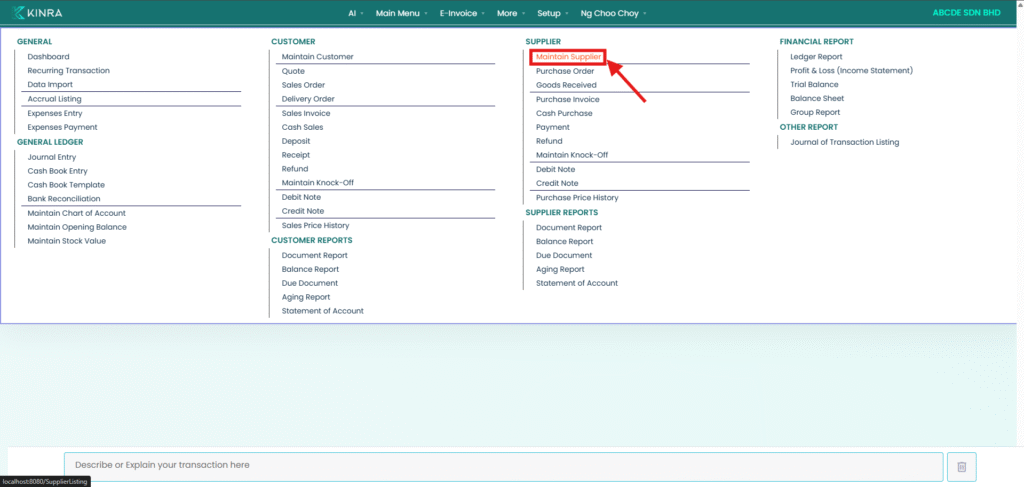
To begin:
- Go to the main menu
- Navigate to Supplier > Maintain Supplier
- Click the “Add New Supplier” icon
This will open a new supplier form where you can begin entering details.
✅ Step 2: Enter Basic Supplier Information
Start by filling in:

- Company Name
- Business Registration Number
These fields are essential for proper identification and recordkeeping.
✅ Step 3: Fill In Mandatory E-Invoicing Details
To ensure LHDN e-Invoice compliance, complete all required fields:
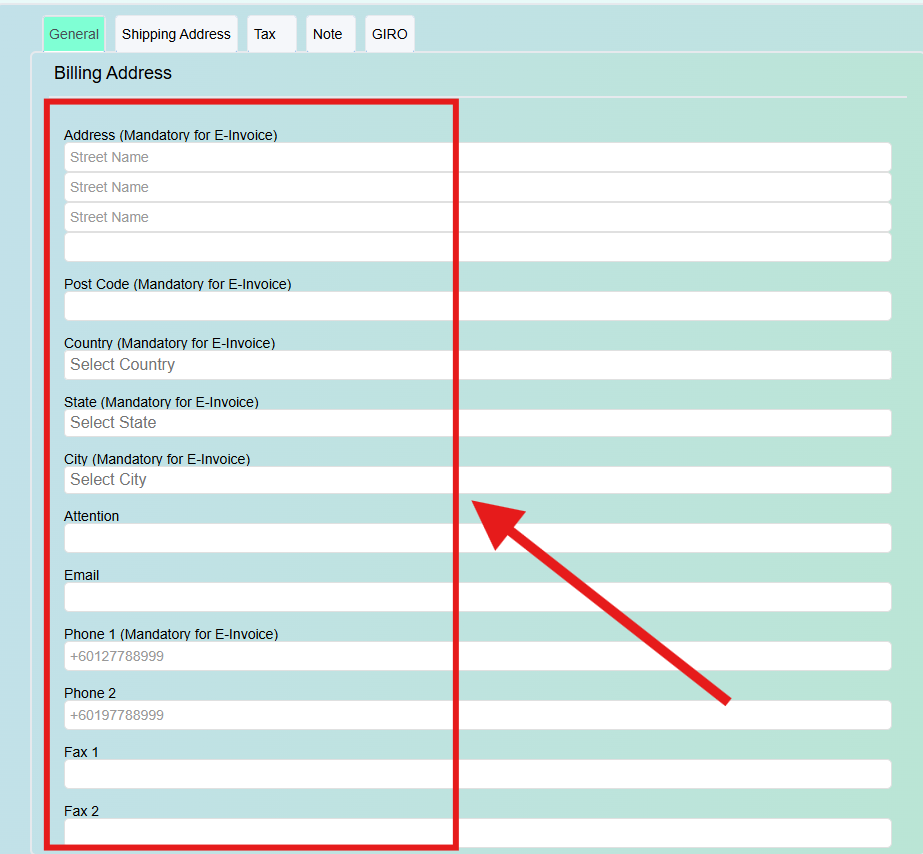
- Address
- Postcode
- Country
- State
- City
- Phone Number
- Any other relevant contact information
✅ Step 4: Choose E-Invoice Category & Set Supplier Type
This step is crucial for correctly classifying your supplier and validating their tax information.
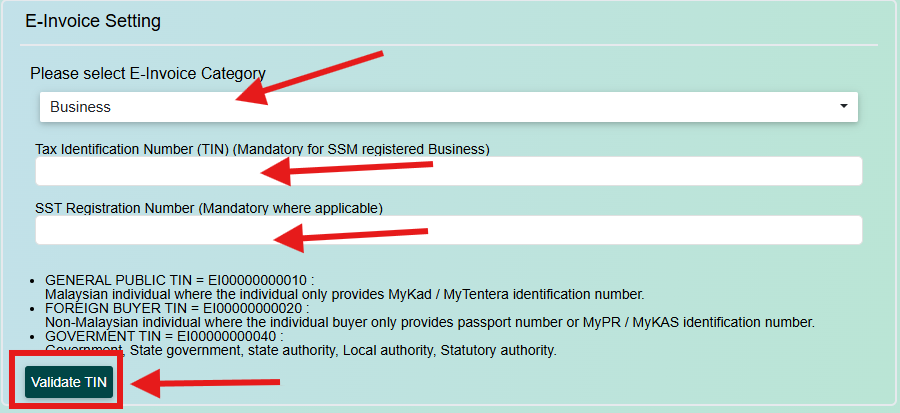
1. Select the E-Invoice Category
- Choose the appropriate e-Invoice category
- If the supplier is exempt from issuing or receiving e-Invoices, select “Exempted From E-Invoice”
2. Identify Supplier Type & Validate TIN
🔹 Business (Company or Organization)
- Select Business
- Enter TIN Number, SST Number, and MSIC Code
- Click Validate TIN
🔹 General Public (Malaysian Individual)
- Select General Public
- Use Default TIN or manually enter TIN
- Choose ID Type (NRIC or Army ID)
- Enter the ID Number
🔹 Foreign Supplier (Non-Malaysian Individual)
- Select Foreign Supplier
- Use Default TIN or enter TIN manually
- Choose ID Type (Passport, MyPR, or MyKAS)
- Enter the ID Number
🔹 Government / Local Authority / Statutory Body
- Select the appropriate government entity type
✅ Step 5: Finalize Account Setup and Save
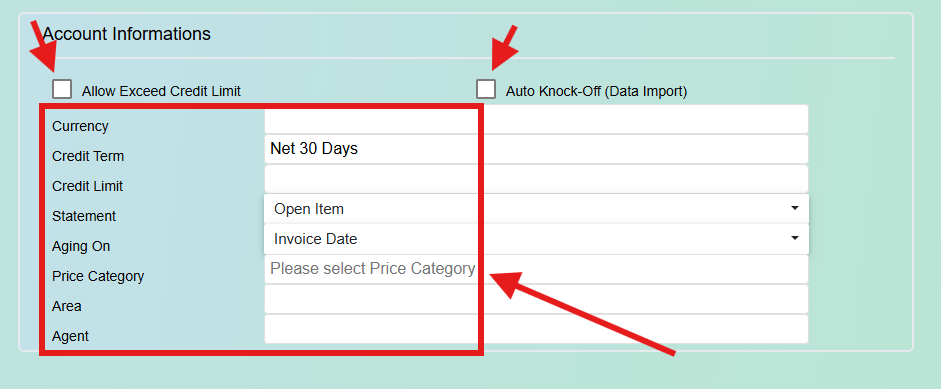
⚙️ Account Preferences
- Enable Allow Exceed Credit Limit (if applicable)
- Turn on Auto Knock-Off for automatic payment allocation
💱 Currency, Credit Term, and Credit Limit
- Default currency is MYR; change if using a foreign currency
- Set your Credit Term (e.g., 30 days)
- Define your Credit Limit based on your agreement
📄 Statement and Aging Options
- Under Statement, choose Open Item or Brought Forward
- Under Aging On, select Invoice Date or Due Date
🏷 Final Setup
- Choose the correct Price Category
- Assign the relevant Area and Agent
- Once everything is reviewed and complete, click “Save”
✅ Final Thoughts
Adding a supplier in KinraSoft is designed to be easy yet comprehensive. By following the steps above, you’ll ensure your supplier data is:
- Fully e-Invoice compliant
- Properly categorized
- Ready for accurate billing and reporting
Need more help? Check out more KinraSoft tutorials or contact our support team anytime.